Thursday 15 March 2012

The final completed film!

So in just over three weeks of working on this late into the night I've finished the entry, before I go into any long explanation and review of the process I'm going to let you watch it, remember to change the quality settings to HD and enjoy.


As I had explained in my early posts this project had been inspired by the works of Damien Hirst, I was keen to produce something creative that was tied into the world of modern art but didn't follow the cliched and overused paintbrush effect.

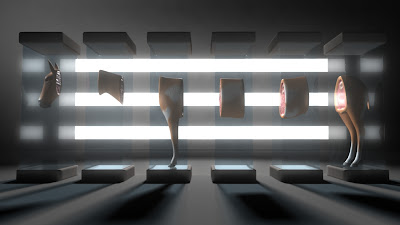
As a fan of Damien Hirst's work I looked to create a homage to his cow and steers sculpture, for me I envisaged it as a complete campaign of stings that ask the audience is this art? From the several ideas I had for me this was the most striking. At first I didn't think I could do it, not because of a lack of technical skills but because I was afraid it would be seen as copyright infringement. Fortunately I spoke with an art director from sky creative about my ideas and she advised me about changing the animal and including some movement so it becomes a nod to Damien's work rather than a clone.

I started off modelling a zebra which soon became a horse and the reason for this was explained in this post here.  With the horse completed I began experimenting with hair/fur and that is what I spent the remainder of the weeks doing. I tried several plug-ins and found all of them to have their challenges I settled with using Joe Alter's Shave & Haircut but render times were incredibly long. Some of my test shots were displaying artifacts and often maya would crash.  This was all a learning process and with the plug in being so specialized finding sufficient learning  resources online was a challenge. With much experimentation I found the settings that best suited my project and was able to render it all out using various workarounds one of which is explained here

During the course of the project I learned many new techniques fur/hair was just one of them. Until now my use of render layers, passes and motion blur was non-existent and once I had learnt about these features I felt it was necessary to pass them on in some way through the use of technical tutorials and tip posts. I even researched html so that I could add meta tags to my blogs to promote them online. 

While I am very pleased with the result of my work there were compromises I had to make. The third shot although not overly noticeable is actually void of any hair/fur. This isn't because I can't produce the effect, I've proven that with the first two shots, the reason is purely a time one the shots were all ready but with the fur pass taking twenty minutes per frame to render on that shot alone it had to be abandoned. 

My total render time for this project had all ready clocked up 46 hours the additional fur would have added a further 48 hours to that total. I couldn't leave my computer running for 94 hours it would never have coped and to split the render up would have taken up 8 days of my schedule, time I wouldn't have. The lack of fur in the third shot is a shame but it doesn't detract from the look and feel of the sting. I planned it fromt he outset to time well with the music and to hit the competition briefs criteria.

What I've really gained from this project is an effective showreel piece and a variety of transferable CGI skills, and hopefully a place on the contests shortlist.
How to add a glow and bloom pass in after effects

Hi everyone, in the process of doing this project I have created my first After Effects tutorial. I thought what better way to make use of what Ive learnt than to pass that teaching on to others. I won't explain much about it here the tutorial does that more effectively.

Wednesday 14 March 2012

The importance of Storyboarding, Animatics and pre-visualisation

So here is a pre-visualisation I produced for this project, with a very specific time frame to fit this concept into I needed to plan it out I drew a quick storyboard which I won't embarrass myself by uploading then I planned the shots in maya and created some quick playblasts. I took the playblasts into premiere and edited them to the music track. This helped me establish the timing and angles of my shots before I invested in long render times.
When working in a visual medium the use of storyboards and animatics can't be encouraged enough. A well drafted storyboard can help you to establish what works for your film, an animatic can be made from that to help visualize timing and the beats of your story. Pre-visualization is a newer concept and that is taking the storyboard into 3d space so that shots can be planned physically, you can tell where on set to place your camera and at what angle you need to shoot it. All of these techniques are ever more essential for the modern film maker.

Sky Arts Logo Reveal

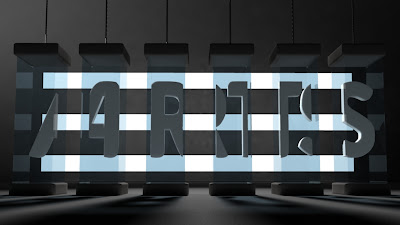
I actually finished this shot on monday but its only just rendered today. This is the reveal to the arts logo, all sliced up. What i did was I took the provided logo and imported it as an image plane. I used the create polygon tool to trace the image and extruded the letters together. Then I did the same as I had with the horse and used the cut faces tool to slice it up nicely. At the end of the sting the letters come together against a black backdrop. When I met the art director from sky she had explained that the word arts didnt have to look exactly the same in the last 8 seconds as long as it looked like it and it does say in the brief that it can still move in those last 8 seconds so I hope that works.

Tuesday 13 March 2012

re-textured the opening shot

I wasn't too happy with the change in the fur between shot one and two so spent the evening redoing the whole shot. Its rendered nicely but I'll need to colour correct it closer to the time. To change the fur in shave and a haircut I increased the root and tip thickness and upped the passes to keep the roots soft. The trouble I've found with fur is that if you increase the thickness it begins to look less integrated with the model, upping the passes seems to correct that issue. 

The fur seems slightly blocky at the roots still but without upping the haircount too high its unavoidable with the system I'm running here at home.

Monday 12 March 2012

master shot render time countdown

So I've begun rendering the third shot for this animation I was up until 2.30 last night tweaking all my render settings and setting it to batch render.

I've gone to bed got up, got the kids off to school tidied the house and I've just sat down to check my render progress, 79 frames out of 144. So the total render time so far is 9 hours and a bit. I haven't even begun rendering the fur pass yet!

The joys of lighting and rendering.

Sunday 11 March 2012

Shot Two rendered and Composited

Very happy with this result let me know what you think.

How to add motion blur in maya. - Tutorial

Hi guys,

Here's a quick tutorial for adding motion blur in maya, its a quick and easy feature to add that will increase the production value and aesthetic appeal of your animations. But be warned it isn't a quick render, add this and you'll be adding several minutes to each frames render times.

So before I give you the easy way to add motion blur let me mention the quickest way. For a faster way to add motion blur you can render your animation with a mib_motion_vector pass and if you have nuke you can use this pass straight away to add convincing motion blur in a lot less time. If you're an after effects user you can do the same but you'll need to pay out for this very useful plugin Reel Smart Motion Blur as far as pluig-ins go its not too expensive either. To make use of a mib_motion_vector_pass I can't recommend a better after effects motion blur tutorial than this one.

But for those of us who are students and hobbyists with less money to part with heres the way to do it out of maya.


First off this isnt difficult so to activate it go into your render globals and select it in the roll out as shown above. Your options are motion blur off, no deformation and full. If you are just animating a camera or a static non deforming object like a vehicle then non deformable will do a fairly good job and not take quite so long to render. For anything thats been skinned etc so characters and such you will need to choose full.


Next you need to select your renderable camera do this in the View tab of your camera view. Then press ctrl-a to bring up the camera attributes.


In the camera attributes find the special effects rollout and this is where you can change the shutter angle, the shutter angle in combination with the speed of movement is what effects the amount of blur the animation displays. For a blur close to that of a film camera set it to 180.

So thats it, render it now and it looks beautifully blurred and much more appealing. But as a word of warning make sure you make a selection of test renders from across your shot, make sure your motion blur is right for the look you want before you let it batch render for seven hours.

Rendering Motion Blur in Maya

I'm now in the process of rendering the second shot with full motion blur, its expensive for render times but it  increases the realism of a shot 10 fold. As its not fully rendered or composited yet here's a frame from mid shot to show the blur off nicely. Click here for my motion blur tutorial.

Friday 9 March 2012

Maya 2011 crashes loading file from new version

Maya 2010 has been very buggy the last few days just as Im ready to render every time it crashes, I've looked far and wide for a solution and couldn't clear the errors even re-installing didn't seem to work so the great news is I installed maya 2011 for free from there education community site. Problems occured there as well, fur rendered fine in this version but as soon as I imported my scene from maya 2010 or maya 2012 (yes I have all three versions, mainly because my different plugins are only licensed for older versions!)

so rather than bog things down in rendering Ive created a unique and rather crazy workaround (hey its about getting the job done right?) I've rendered my scenes with all the layers in maya 2012 and then exported the camera and lighting data as an fbx to maya 2011 (where I have shave and a haircut installed.) Then I've rendered the fur separately from there and I am in the process of compositing now. Below are some pics.

The basic horse head render (maya 2012)

the hair/fur render with its alpha channel (maya 2011)

A test composite in photoshop adding the fur on as a screen blend layer with adjustment to levels etc.

Wednesday 7 March 2012

Lighting Set Up

Iv'e been working on this project solidly for a few days and Ive had to scale back the fur a bit as the render times are too long. I've also been working on the lighting for the scene. Here it is, because fur hates raytracing I've got just one raytrace shadow light above and behind the glass to create the caustics this light will be switched to depth map shadows for the fur pass. I've parented a single spot light to the eyes to give that reflective quality and another light to illuminate the horses innards. The three light panels are just planes with the incandescence turned up and a glow effect. Because they are in the same location as the spot it looks like they are illuminating the horse.

The glow effect will be added in post because in Maya it tends to flicker on animated objects.


Tuesday 6 March 2012

Render passes

After adding fur to the rest of the model render times jumped to almost 20 minutes a frame, an unacceptably expensive render. To reduce it I decided to render the fur separately without raytrace shadows I did this and it reduced the render time to twelve minutes, the problem was the reflection pass was empty for the glass cases. I created a new simple scene and practised with some different materials and discovered the mistake was an oversight on my part I was using the mia_material_x and to enable render passes it needed to be a mia_material_x_passes. Duh! a bit obvious now. Heres some pics of my 'practice'.

Diffuse no shadows

Shadows (in maya they render inverted.)

Ambient Occlusion

Z-depth (for post production depth of field in AE)

Reflection pass, the left column was also reflective but is missing because it was a mia_material_x not the mia_material_x_passes material.
All layers composited (I went back and rendered the column correctly.)


There are plenty of tutorials out there. Quite a clear one can be found here: Maya Render Pass Tutorial  http://www.pixelcg.com/blog/?p=924

Sunday 4 March 2012

Shave and haircut fur not rendering in glass material

Here are some pics of the problem I was having with explanations.


With the hair settings as they were, the moment the glass was added the fur failed to render. I played around with a lot of settings and had no luck. Then I found the tutorial I link to in my earlier post.


After following the steps I turn the hair into hair primatives I get the above, its fur but its grey. At least this time it renders in the glass case. to fix the problem I asign the same head material.


This is the result with caustics, final gather and raytracing, it looks good and this time took only a few minutes to render at HD. 

I also wanted to increase the glasses refractive attributes to create this disjointed look. The shader I had was great for thin glass but to get the effect I wanted I would need to go back to a mia material but the black edges were still an issue. I fortunately found a great tutorial that explained the issue perfectly, it was written for 3ds max but the principles were the same. the issue was that the refraction rays in mental ray and the trace depth didnt match the same attributes in the glass material meaning that light entered the glass but didn't bounce back out causing the blackness. With that issue addressed the mia material glass rendered beautifully. Heres a link to that tutorial. http://www.mrmaterials.com/jeffs-blog/67-fix-the-black-edges-on-your-glass-material-and-other-stuff.html

The only problem is if you save the scene while the hairs are as hair primatives when you reopen the scene the fur is missing and rendering crashes maya! So the workaround is switch to hair primatives to render but switch back to buffer in the shave globals before saving and closing.

Problems rendering fur in maya

So, Ive been having real problems with the fur just when I thought I had mastered it, if I change angle or dolly out or put the glass back into the scene the render time hits 9 minutes and the fur is gone or is patchy, I've attached an image to show you. The lighting is really nice now but this is becoming a nightmare to work on, ipr causes crashes so I have to keep rendering low resolution tests and each of those 320x240 images is still taking 5 minutes to render. A lot of time wasted waiting to check stuff. If only I had upgraded my ram before starting this thing.

Just when I thought I had mastered the fur! spent all night last night and all morning looking for a solution, think I may have found it heres the link. I'm following that tutorial now wish my luck.   http://kiryha.blogspot.com/2010/06/rendering-fur-with-mental-ray.html

Saturday 3 March 2012

Using shave and a haircut

I ditched maya fur for shave and a haircut a great intuitive plugin for maya from www.joealter.com/  That being said it isnt without its problems which Im planning to post about with hopeful workarounds.

Modelling the scene and glass cases

I created the temporary scene hopefully the beginning of this week I will film a background plate at an actual gallery and create an hdri image to add to the lighting of the scene. I need to up the final gather in this image to clean up the blotchiness in the shadows and render it with the fur. The background plate and the HDRI should add some realism to the scene.

Glass in maya has black sides and edges !

One of the issues Ive come across is the glass I was using was a mia material preset and I was rendering it and it came up completely black, i messed with the settings and got it to look partly transparent but the edges were black still! Getting very frustrated about it my good friend James http://shortshorts-skyarts.blogspot.com sorted me out with his glass shader. It worked first time without any issues. Check out his musical themed entry in the link above. 

Friday 2 March 2012

Creating an Eye shader in maya

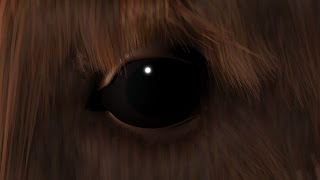
I've just textured the eye and created a shader for it. For this horse its quite simple, ive just created two spheres and the outer one has the mia_material_x applied to it with the thin glass preset. I then turned the refraction colour down to 25% grey and then added a simple texture map to the sphere inside it.

The reflection was also turned way up because from all the reference photos of horse eyes the pupil is very large and the sclera is very reflective. Of course this image doesnt reflect much but it will when i shoot the background plate. For now I created a spotlight and light linked it to the eye and the Gunky stuff arond it etc so it lights the eye but doesnt effect the actual head.

Thursday 1 March 2012

Fur Mastered?

So after plenty of messing around with settings and functions in maya I finally got the fur looking pretty sweet, heres the test render, it took over four minutes. Im not going to render fur again until I have everything else ready I cant waste 4 minutes a time to test render. I hope that I have the fur under wraps now but we'll have to see when I try and recreate the same effect for the other body parts!